
In this tutorial, I am going to run you through how to set up AWeber autoresponder for email marketing. Once you have completed this article and implemented what I will show you, you will be well on the way to success with email marketing.
Note; This tutorial is designed more for those who have never seen or used an email autoresponder before. I will cover the basics to get you from complete novice to being able to build and profit from email marketing using AWeber.
Need more help? You’re in luck I am an ACE (AWeber Certified Expert) and happy yo answer your questions so if you still have more after you have read this article post them in the comments below. Or hire me from the Aweber website in the certified expert’s section here
Okay, so let’s get started…
Getting Started With AWeber
Now the first thing you will need to do is sign up to AWeber. This you can do for free… I would recommend staying on the free account until you have subscribers filling your email list and have more experience in email marketing.
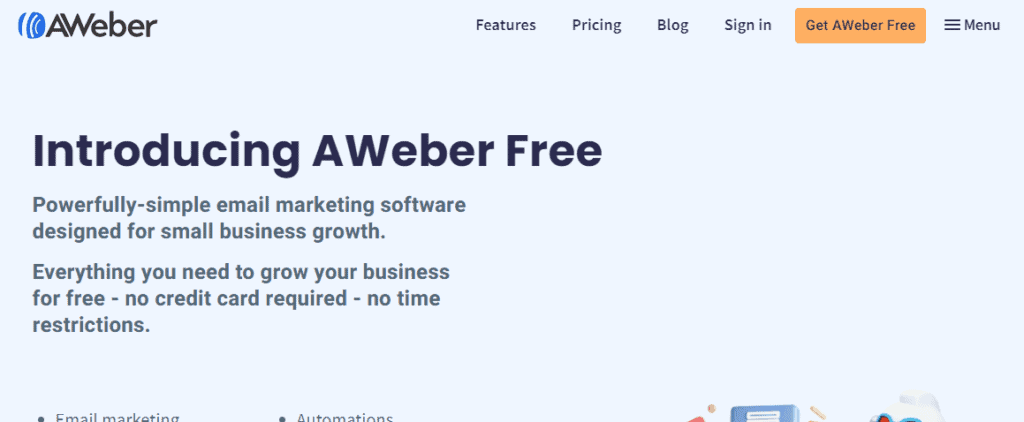
July 2020 Update… AWeber is now free, with no time limitations so it’s never been easier to start email marketing
How cool is that…
Sign Up To AWeber Free Account
You will then be prompted to fill in the registration form with the normal name and email. There is no need to add credit card details as there is no restriction on how long you can be a free account holder. Most autoresponders do not allow this feature.
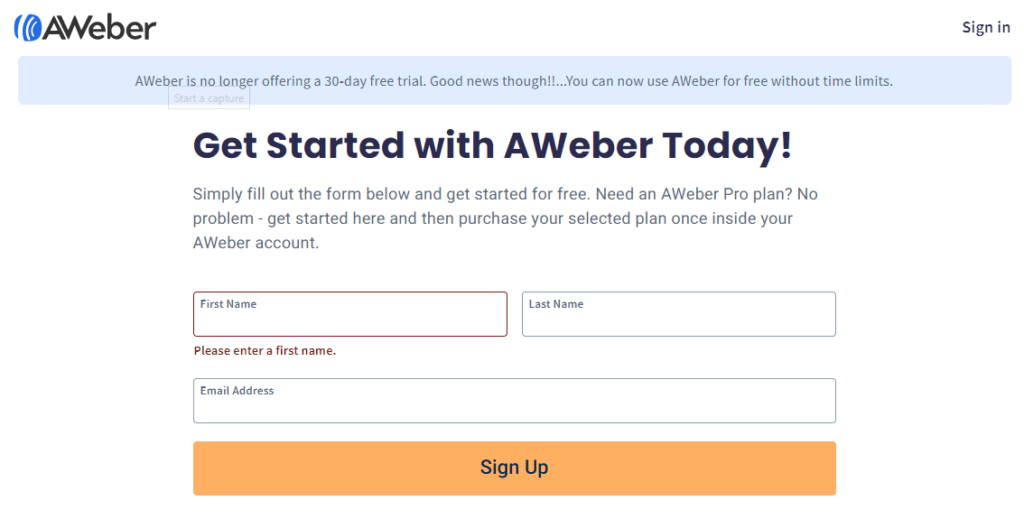
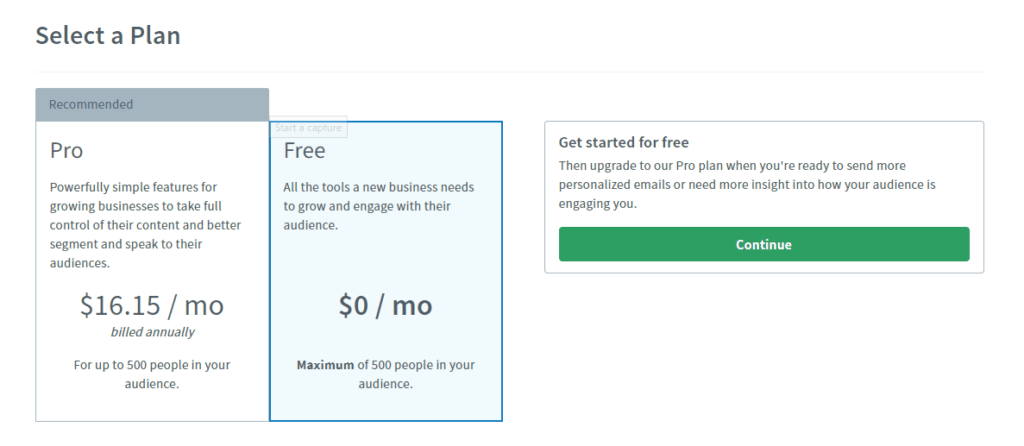
If you did want a pro account just sign up and then upgrade inside. Just choose the free account and continue.
AWeber Dashboard Overview
When you log in you will always be taken to your dashboard, this will give you current stats on your account, lists and, subscribers. You can access everything from the dashboard and I will walk you through the process of creating your first list shortly.
But, before I do remember if you are changing over from another service, then make sure you download your subscribers before you leave as by following these quick steps you can import all your subscribers with just a few clicks.
Hoover over the subscriber’s tab and then choose to add subscribers from the drop-down options. Then add your subscriber file and then continue through the process. But, you will need to create a list first so you have somewhere to put them.

So, with that in mind let’s show you step 1…
Creating Your First Email List
Head to manage lists, yours will have no lists here as you don’t have any yet but as you build different lists this is where you can access all of them. With Aweber, it’s handy to know that you can create an unlimited amount of lists.
To start your first list just hit the create list button.

Here you will be asked to fill in some details, company name and, website (if you don’t have a company then just use your name). You need to select the address to appear on the foot of the email, this should default to your billing address you entered earlier but you can add other addresses if required.
The next details are quite important.
Your name. This is the name that your subscriber will see in their inbox so make sure you have the best one associated with your business to maximize open rates. My name says “Martin – Newbie Affiliate” This enables my subscribers to see which brand is sending them the email plus I am personalizing it too by adding my name.
This can be changed at a later time so don’t panic too much when first starting out.
The next step is describing your list.
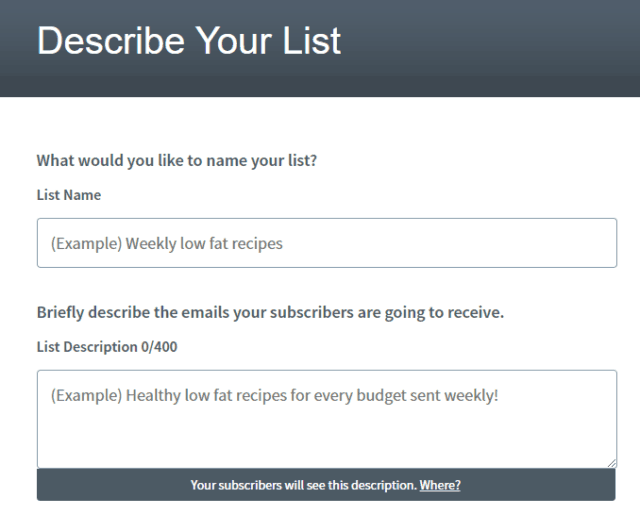
Enter a name for your list. Make this readable as your subscribers will see this. Also, add a description of what the list is about and what emails you will be sending people.
The final part is to approving your confirmation email message. This is an email that is sent to your new subscriber to confirm that they do want to receive your emails.

Select your language, and your subject line for your email from the variations in the drop-down, note you can add your own but this would need to be approved.
Read through the preview email and make sure it makes sense and has everything you want it too.
If all good then hit the “approve message and create a list” button.
Yeah well done you have just created your first list. Now let’s walk you through writing your first email campaign.
Writing Your First Email Message
Having created our first list now it’s time to write an email that you can send to your subscriber when they join your list. You can start to write this by clicking on the create message button within your dashboard area.
Then choose the drag and drop email builder.
Before I show you how to use it, let’s just quickly run through the different sections of the drag and drop email builder.
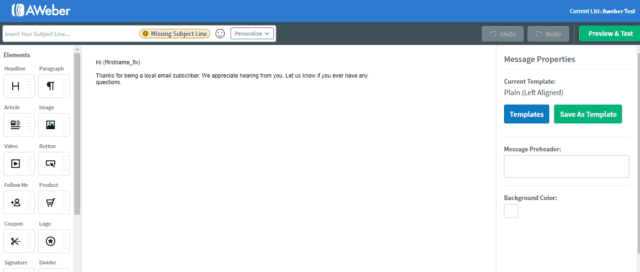
Ar the top is the section for your subject line this is where you can write your captivating wording which will be seen in the Subscribers inbox, next to the sender’s name. You can also personalize this by adding the Subscriber’s name, this can help build your relationship and also can help to get a higher open rate.
Keep your subject line fairly short and relevant to what the subscriber will read when they click through.
Avoid spammy titles!
To the left-hand side are the elements for building your email, just click and drag each element to the central template area. You can add, images, headings, text, videos, social sharing, signatures and loads more.
I would suggest playing around and creating a base template to include your logo, basic layout and, email signature this you can then save as a template.
You can also click on the templates button to the right-hand side to use AWeber’s pre-designed templates. You can also access your saved templates here too. Choose my templates after clicking through to templates.
What To Write In Your First Email
Firstly, check out AWeber’s free template guide with 45 email templates that you can adapt for your business and offers. Grab your free templates here

But this is what works for me…
I welcome my subscribers by telling them a little about me and what they can expect in terms of emails going forward. I also direct them to follow me on social platforms and show them I have more free articles and videos on my blog and YouTube channel.
This starts to build trust and a relationship.
Also, you may want to include a link to your free gift, so they can download this, I personally send them to a download page on my website and there are two reasons for this.
- They get used to clicking and following directions from you, this is critical if further down the line you will be sending them to affiliate offers.
- You then have an opportunity to promote offers on your download page, don’t go mad here and be focused and relevant about what you promote.
If you don’t currently have a website/blog then having a download link in your email is fine.
Although, using a blog is one of the best places to build trust and your email list. Here I show you how to build a website from scratch in under 10 minutes.
What To Offer For Subscribers To Sign Up
There are many ways to get people to sign up for your list. You want to keep this simple and that it solves a problem.
So often I see people trying to offer a newsletter sign up, now there is nothing wrong with this but does it solve an immediate problem for your subscriber… probably not!
But, by offering them a report, checklist, ebook, worksheet, cheatsheet, video, or e-course about a particular issue they have would be better suited.
Then… as I mentioned earlier, in your first email say that you will keep them updated on a regular basis about what’s going on in your niche, (in other words your newsletter). This works much better long term and of course, there’s is nothing stopping you having lots of giveaways each with their own list in AWeber.
If you are having difficulty deciding what to offer search some others in your niche and see what they are giving away, you could even go one further and sign up to their list and see what they are promoting too. This will give you loads of ideas that you can then adapt and make even better.
Adding Your Email To Your List
Okay, so I have shown you how to build your list, create your email and, given you ideas of what to giveaway. Now all you have to do is, preview and test your email (especially if it includes links) just hot the preview and test button, top right-hand corner of the dashboard then add your own email and name and send a test to yourself.
This will enable you to look at how the subscriber will see the email in their inbox, and two you can check that everything reads okay and links are all working fine.
If you need to make changes just click back to the editor.
If all done then click save and exit, this brings up the drafts page.
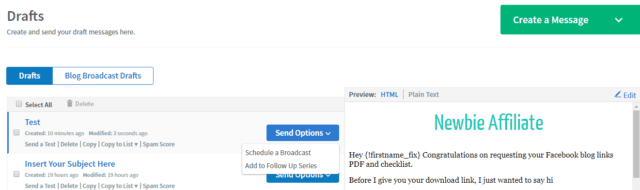
You can then choose the email you want to add and then from the send options drop-down menu select add to the follow-up series, you do also have the ability to send as a broadcast, this would be an ideal way to send your monthly update (newsletter).
You are then shown an interval window this is where you can say when you want your emails to go out. Remember your first email of each campaign will always go out immediately. But as you add more emails to the series you will be able to not only decide how soon after the first one it is sent, but you can even choose a particular day of the week and what time of day, now that’s cool!

Okay, you can now go back and repeat the process and add as many emails as you wish. These will then be automatically sent out whenever someone signs up to your list.
This is why email marketing is so powerful, set up once and leave to work its magic.
You can add more emails to any series and change the order or them at any time.
Creating Your Optin Form
The final part of the process is to create your opt-in form. You have a couple of options here. If you have no website then you can use one of AWeber’s pre-built landing pages. These are hosted by AWeber so no additional cost of hosting these are needed.
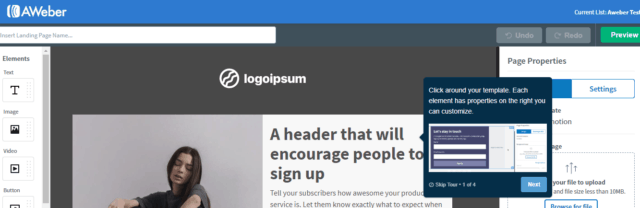
You can access these on the main dashboard menu under landing pages, then choose, create a landing page. You can then select from the templates shown, currently, there are six but this could be more when you view them.

All these templates are completely editable, including font, colors, images, social sharing. There is even a walkthrough tutorial if you get stuck. It’s just a simple drag and drop editor similar to the email editor. You can still add a custom thank you page if you wish, but unless you have a website this could take them to an affiliate offer.
If you have a WordPress website/blog then you can then add the optin forms to various places around your blog and with the addition of a page builder plugin such as Thrive Architect you can build your own awesome landing pages, thank you pages and download pages.
Read this article on all the different ways to can get people to opt-in on your blog
To add your optin directly on your blog without any additional plugins you will need to build your webform and add some coding to your site. Don’t panic here it’s very simple just follow these steps.
Choose the list you want to build a form for and then select sign up forms from the main menu.
There is a video on the sign-up form page to walk you through if needed, click the create a sign-up form button when you want to get started.
The first step is to design your form…
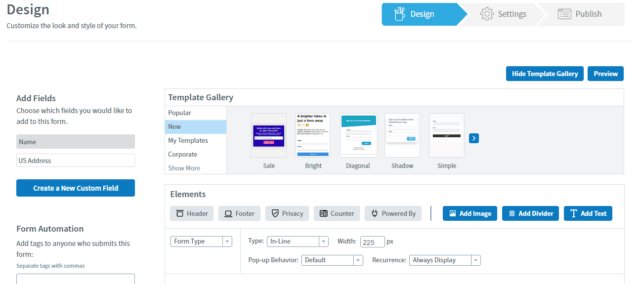
There are various designs to choose from and again they are all editable to suit your brand. Keeping it simple for your first optin is probably key here, and as you gain more confidence with this you can redesign or use a plugin that I use called Thrive Leads.
Once you are happy with your form just save it and go to step 2
Step 2 is about adding some settings for your form
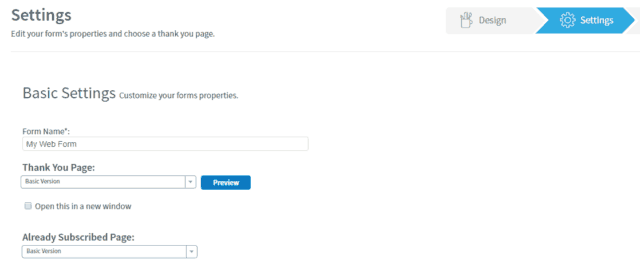
Give your form a name this can be quite detailed as it’s just for your eyes only. So you can name it something like “Blog optin sidebar” this will help when viewing your stats, you can see how many people have used this form to sign up.
Works well as you add more forms around your blog.
You can add various options here as to where to send your subscriber after they sign up, including your custom thank you page, audio page and, video page too.
As I mentioned earlier a custom thank you page would be my favored way to do this and is ideal if you have a blog. You can preview your custom link before saving. At present, I would ignore the advanced settings for now.
I will cover this in more detail in another article.
The final step is to publish your form onto your blog.
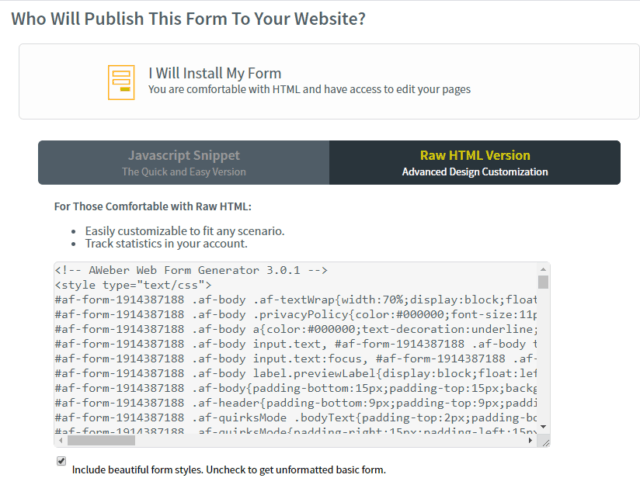
Choose I will install my form and then copy the raw HTML code. I would paste the code into an open notepad on your desktop as you will need this on your website.
So let’s show you how to add this code on your WordPress blog sidebar which is probably the most common-place to add it.
Log into your dashboard and head to appearance, then widgets.

Here you can control all your widget areas these will vary depending on the theme that you are using. As you can see I have various widget areas but the one I am going to use is the primary sidebar area.
What I need to do first is, drag the widget from the selection on the left-hand side and place it in my widget area. I will be using the custom HTML widget which all themes should have available.
If you already have some widgets in this area just add and then once it’s live and you can see it you can then go back and reposition it.
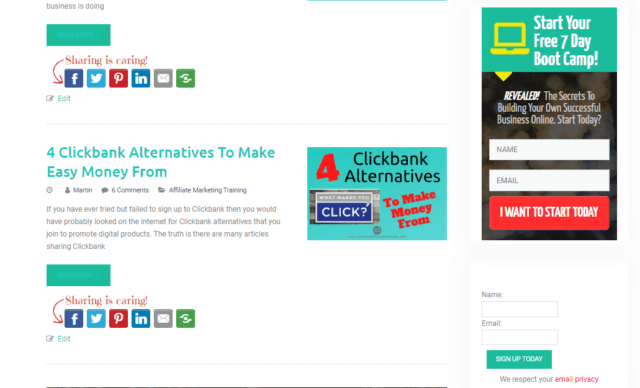
I already have an optin form on my website which I created using Thrive Leads, but I will add the form created in AWeber directly underneath.
To do this click on the drop-down arrow on your custom HTML widget, that’s if it didn’t open automatically when you placed it. Then go and grab the HTML coding that you would have saved and then paste it inside the empty box.
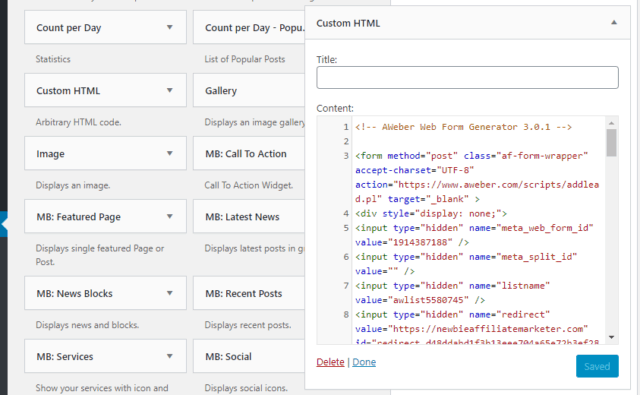
Then click done.
Voila, you are done!
Let’s just check that it is on the site… as you can see it is there under my current optin form which I produced using Thrive Leads, although you could create a more detail form in AWeber using additional plugins have always been something that I have done as it makes it far easier to add these forms in other places too, such as my exit pop up.
Be sure to check out the Thrive Products they work brilliantly when integrated with Aweber.
There are more things I could go into but for now, this will get you up and started with your email list building. I will show you about segmentation, tags, and split testing on another advanced article.
Until then, if you have any questions then please reach out to me by commenting below.
Disclosure:- Affiliate links may be used within this post. This means that if you purchase
through my site after clicking a link then I get a small commission, at NO extra charge to yourself. This helps
me to continue giving great free content. Thanks
This is awesome, thanks for putting this together because I’ve been wanting to add an email list to my site for sometime now, but did not know where to start! Just even deciding between Aweber and some of the others has been confusing to me but your solution seems like a great one, plus I really appreciate your tutorials so I am excited to go with Aweber.
Hi John, I have been using them for years now and they keep adding new features that are making it even easier to build your list. For the price and what they offer they are certainly one of the best around.
Email marketing is one of the most powerful and effective tools for the affiliate marketer, and as such it’s imperative to have the best possible auto responder. As one’s business grows, so too does the traffic, and it becomes impossible to be able to work and reply to all comments at the same time. With AWeber I see that it has a very user-friendly interface and I like how it integrates so well with WordPress. I have been on the lookout for an auto responder as I have a new project on the horizon, so I will definitely follow your link to check out AWeber further. Thanks for the recommendation and keep up the good work!
Glad you found the article useful, if you have any questions just shout 🙂
Hi, Martain.
Thanks for sharing the information on setting up Aweber autoresponder for E-mail marketing. That was really a complete article on step by step training to do it ourselves. I have bookmarked your page for the future reference. My webpage is quite new With almost no matter inside, how would you suggest to purchase this service. Should I go for it now or wait till I produce atleast 20 articles.
Warm Regards,
Gaurav Gaur
Hi Gaurav, Glad you liked the article. If your site is brand new then maybe get some articles up first. Then I would start building your list as soon as you can as this will help your business move forward quicker. Take advantage of the free 30 day trial that way to don’t start paying until after this.
Great in article Martin.
Has to be one of the best article I have read twice. Great in detail. Thanks.
Thanks Chigs, Glad you liked it, feel free to share with others too 🙂
Martin, thank you for this article regarding how to set up an autoresponder for e mail marketing.
I had never heard of AWeber previously but had used a different system. Aweber looks relatively easy using your video and step by step process. I like an automation system as it takes a lot of the long term hard work out.
The cost of this system is also really good and you get a chance to try out for a month before buying.
Thank you a great article.
Thanks for dropping by Imelda. AWeber is one of the oldest email marketing service providers I have found them great and continue to use them.
This text is amazingly structured and easy to read! I really enjoyed reading the article about how to set up Aweber Autoresponder For Email Marketing. I am definitely going to use this! Making a e-mail list really is awesome!
I will be signing up and following your instructions as you have written.
Thanks Ragol I look forward to helping you succeed with your email marketing.