
 If you are looking to build a website from scratch but have no technical skills then stay tuned and read on as I show you how you can do just this. I will give the basic step by step instructions that will be easy to follow.
I will cover how to get your website up and running on the internet and some simple design tricks that will help you have a stunning website in just hours.
Whether you are a local business, internet marketer, blogger this guide will get you a website LIVE on the web that your clients and customers can visit.
Before I dive right into this let’s cover the elephant in the room…
How Much Does It Cost To Build A Website
Well, of course, the answer to this question is not straight forward as if you contacted ten different web designers you would probably get ten completely different answers. If I do any websites these days my starting price is $1000 upwards. I am always happy to quote for you, (contact me via my other site Designed-4-u.com ).
Bu,t I take it that you want to build your own and keep that cash for other things. Well, you can and I will not be charging you a dime!
That said, to do things properly, there will be some expenses you will incur, and I cover those as we go through the steps.
These costs will be very small but, if you have no funds at all then there is another way of getting a website for free. I will be covering the best way to build a website within this step by step guide, and I would recommend you follow this route.
However, the free route is laid out in this article should you have ZERO funds available.
Let’s get started…
Disclosure:- Affiliate links may be used within this post. This means that if you purchase through my site after clicking a link when I get a small commission, at NO extra charge to yourself. This helps me to continue giving great free content. Thanks
Step 1 – Website Name And Hosting
The first thing you will require is to choose a domain name, this is your website name, for example, this site is called Newbie Affiliate Marketer, so it made sense to see if the name was available as a domain name and as you can see it was.
I would always try and use keywords or business names within the domain name as this will make it easy to remember for visitors and will help when branding your business online. You can check the availability of your domain name by using the checking in the sidebar on the right-hand side (or under this article if viewing on a mobile).
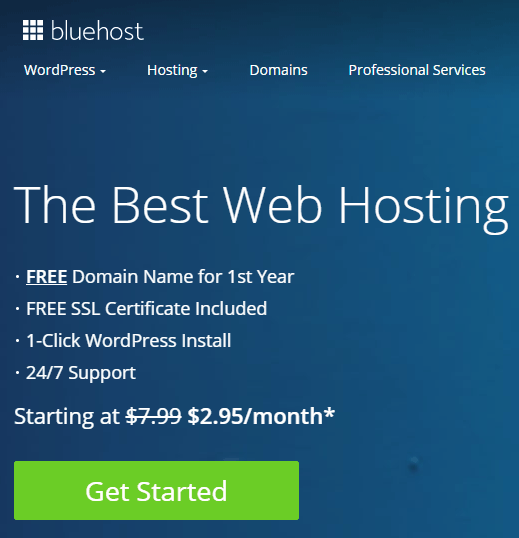
Free Domain Name With Bluehost
 When you have your domain sorted then you will need to find a hosting company. Both of these things will enable you to control your website and why I say it’s best to follow this step by step guide rather than go down the free website route.
By using my recommended WordPress hosting they actually give you a free domain name for your first year, so all you have to pay is for the hosting.
You can get started for as little as just $2.95 a month, which is less than a good cup of coffee.
Click the get started button and then choose your hosting plan, the basic plan will be great to start so no need to pay more, then follow the steps by filling in some personal details, and then purchasing your hosting.
Buy Bluehost Hosting With Free Domain Name
Amazing how simple it was that you are now all set ready to build your website.
Step 2 – Add WordPress
WordPress is probably the most powerful web platform in the world. primarily built as a blogging platform it has evolved into the most versatile system there is. I build all of my sites and clients’ sites on WordPress.
And by purchasing your hosting through Bluehost you can easily add the WordPress system with their one-click install button which will be located within your account. You see this is so simple to do.
Within minutes you will have WordPress sitting on your domain name and will be LIVE on the internet.
Don’t panic at this stage as no one knows it’s there apart from you, even the search engines may take a few days to locate it and index it.
How easy was that, well done although it’s just the default WordPress template showing you have done it and got your website live! Give yourself a pat on the back whoop whoop!
In the next few steps I will be showing you how to make changes, add images, videos and content so grab a quick coffee break, and meet you back here in 5.
Step 3 – Plugins
Okay, let’s do this!
WordPress has increased its user base primarily by the versatility of the platform. This is achieved by the use of its plugin system. These are easy to add and simple to use… whatever you are looking to do with your website someone has probably created a plugin that will solve your issue.
To add plugins, just click on plugins from your WordPress dashboard. You can then search you’re plugin looking for. All the plugins available direct from your dashboard are free to install and active.
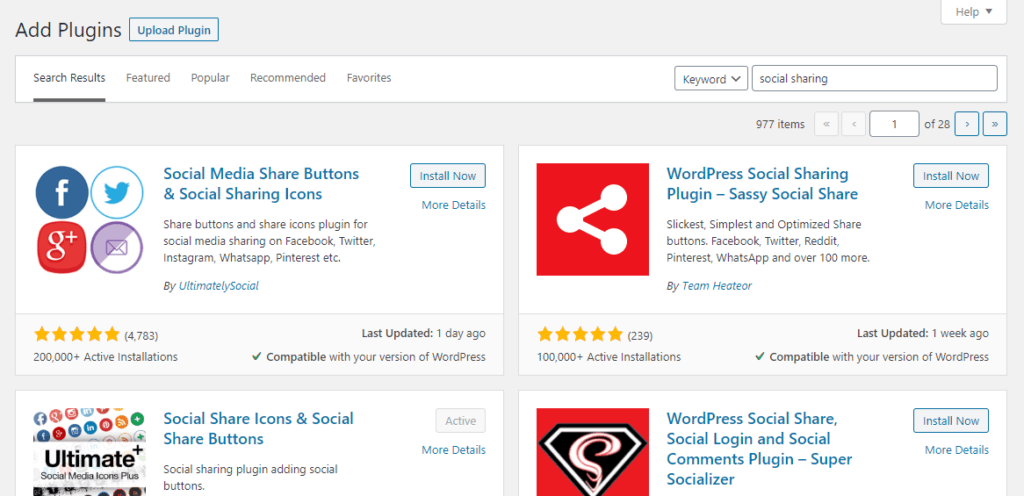
There are also paid plugins that you can purchase. These will need to be uploaded into your plugins section which is simple to do. There is no need to pay for any plugins when starting out as all the plugins you need are available for free.
Here are the ones I would normally add to any website that I am building.
All in One SEO – Brilliant plugin to help with Search Engine Optimization on both your individual pages and posts. Will help you get noticed on the search engines.
Contact form 7 – Ideal if you would like readers to be able to contact you via email.
Akismet – This plugin is added automatically all you have to do is activate it. It is used to reduce spam so a must if you are thinking of blogging.
Cookie Notice – With the new regulations in Europe, this plugin elegantly tells visitors that you have cookies on your site and that you comply with the new GDPR regs.
Ultimate Social Media Plus – Add social media sharing icons to your pages and posts.
Before I move on from plugins beware that adding too many plugins can and most probably will slow your website down, so choose wisely which ones you install and activate.
Step 4 – Themes
Free Versus Paid
I have used both paid themes and the free themes that are available through the WordPress dashboard. The advantages of using paid themes are that they tend to be more customizable, but that said to begin with many free themes are fine for a basic website.
You can change your theme but some of your elements and features may look different or even disappear completely. If you can do some research before deciding this could save you more time in the long term.
Searching Free Themes
To search through the free themes you can head to appearance and themes from your dashboard. From here you can scroll through the massive collection of themes. Tip: You can use the filters which will reduce the number of designs that are loaded up.

You can then preview the themes you like the look of and get more information, you can even install and see how it will look like, this is best done before you have any content on your site. Hence why I have this step before adding content.
Paid Themes
If you don’t see anything that catches your eye and or needs a certain look and feel then maybe opting for a paid theme is your answer. There are many companies out there that sell premium WordPress themes, here are a few people that are well known for great themes.
- Elegant Themes
- Monster Themes
- Thrive Themes
- Theme Forest
- My Theme Shop
Themes will, of course, cost you money but it doesn’t have to break the bank. Starting from about $30 its a small price to pay to have what you want.
If you do purchase a premium theme then uploading is very simple. Head to your free themes area and then click the add new button at the top left then grab your file and upload it will then appear within the themes section all you need to do is activate and away you go.
Step 5 – Customise Your Site
Even with the free themes you can still make changes to the look and feel of your site. Once in your themes area just click on customize this will take you through the area to make changes. On some themes this will be very basic, other free themes get you to upload a plugin and give you a load more options. Here are a few things you will want to change when creating your website.
Don’t panic about this part of the process you can’t really break anything so time to let your creative juices flow!
Headers
Creating an amazing header for your website is a great way to get noticed as its the first thing that people see when they visit your site. I use a site called Canva to create my headers, check out the video below where I walk you through how to design these. It’s so simple even if you have no design skills at all.
You may want to change the font or color palette this will depend on your theme as to how much you can change. Theme Options on the page layout, menu layout, home page and blog options too.
Logos
The other thing you will be able to add on most themes is a logo, this is great for small businesses as visitors can recognize the company as soon as they land on your website.
If you don’t have a logo yet then no problem you could use a site called Fiverr to get one designed for you, or if you feel confident after using Canva for your header then use the same site for your logo. They give you plenty of inspiration to copy and tweak. I have recorded another video showing just how easy it is to do, check it out now.
A limited amount of free themes give you a huge option when it comes to changes, such as font design and size for various areas on your site. Colors for the various areas across your site, even a separate home page layout without any coding needed.
That neatly brings us on to the next section which is building the pages of your website.
Step 6 – Build Pages
For a basic website there, in fact, very few pages required. These are the main pages I would look to add-in:-
- Home Page
- Privacy Policy
- Contact
- About Us
- Disclosure

To add a page simply head to pages and then add new, you can then give your name a title and then save as draft. You can repeat this for all your pages you require and then go back to add the content for each individual one.
Change Permalinks
Before you do that there is one thing you need to do and that is changing the permalinks as the WordPress platform defaults to a page number when it shows up on the internet and you really want to have the main keywords from your title showing up.
So let’s go and show you want to do… it’s super simple!
From your dashboard head to settings and then permalinks. Once on the permalink page select the post option and then click save changes… Done! I told you it was simple!

Page Builders Versus WordPress Editor
You can also use separate page builders to build your pages and posts within WordPress. I must admit that I do use the Thrive Architect page builder to create amazing pages within my website. Although WordPress has its classic editor and now the new Gutterberg editor too this is both still very limited when it comes to building a unique home page or landing page for your business.
There are other page builders such as Builderall and Divi but having used these I always revert to using the Thrive Architect plugin which gives me everything I could ever need to build professional pages.
Here is a video to show you the benefits of using a page builder like Thrive Architect
Buy Thrive Architect Now
Step 7 – Adding A Blog (Optional)
By using WordPress you have by default the option to create blog posts that will site directly within your website. This is, of course, optional and not completely needed if you are just a small business that wants to have a presence online.
A must these days!
If you want to utilize the blog then it’s very easy to get started. Simply head to post and then add new from your dashboard and then start writing and adding content.
I am not going to cover how to write your first blog post in this article, for this information head to my article creating your first sample blog post
This post will go into detail about your blog layout, images, alt tags, paragraphs, and headlines.
I f you are going to look at aking money from your blog then these articles are a must-read too.
How to do keyword research for contact marketing
SEO Best Practices Checklist – 19 Tasks to complete before you hit publish on your blog post
Using keyword research and search engine optimization (SEO) will help people find your articles and help you gain higher rankings in search engines such as Google, Bing, and Yahoo.
Step 8 – Building An Email List (Optional)
This step is again optional but if you are looking to make more money and gain more clients and customers then I would recommend you start it as soon as you can.
FACT! You are already on someone else’s email list FACT! You have probably received an email today from someone. FACT! You check your emails regularly. FACT! Your business needs to start email marketing
Building an email list is easy to achieve and can be set up and then left to run automatically while you get on and run your business. Before I show you how easy it is to set up let’s run through the Pros and Cons to email marketing.
Pros to email marketing
- Helps you keep in touch with your customers
- Allows you to keep promoting offers and guidance long after they have left your website
- Enables you to build trust and relationships with potential and existing clients
- Is easy to set and use
- A great way to add more revenue to your business
- Email marketing still works
Con’s of email marketing
- There is a small monthly cost
- Some time is needed for the initial set up
If you do decide to use email marketing (I think you should…LOL) then finding a good email service provider can be a bit of a minefield as there are so many of them available nowadays.
Before I give you some recommendations let’s just run through what an email service provider does.
It enables, you the client, to capture personal details of your customers or more importantly potential customers. I will explain how you can do this a little later on in this section.
But, once you have their details you can then set up email campaigns that will automatically send your list members’ emails on a set time and day. This then saves you time and money in the long term, whilst keeping in touch with your customers.
Best Email Service Provider
Like I have already mentioned there is plenty of choices when it comes to email service providers. Some of my recommendations in this area would be Get Response, Mailchimp, and Convert Kit.
Although my number one choice (and the one that I have used for over nine years) would be AWeber. Again by giving you the full run-through on AWeber here would make this article very long, so I have written a full overview post that you can read through all about small business lead generation using AWeber be sure to bookmark the article if you are not ready to get started straight away, that way you can locate it again to save you time.
Start Building Your List With AWeber Today
Before I finish up on email marketing let me just cover how to would capture people to build your email list.
Give Something Away
Whatever your niche is your readers, customers or potential customers have problems that need solving. As a business, you have the solution they need and people are happy to give you their name and email (or more details sometimes) to obtain that solution.
All you need to do is give away this information and bingo your email list will grow and grow. TIP: The more specific you can make this the more people could join your list.
Once you have your free offer or give away then use your email service provider to create optin forms across your website so visitors can sign up to your list. You can also create fabulous individual landing pages specifically for giving away your freebies.
Here are some of the things you could offer, remember ideally we are looking to deliver this via email or the internet. This will cut down the work you have to do. That said physical products can prove very popular too but just take up more time to deliver them.
- EBooks
- Reports
- Coupons
- Videos
- Books
- Samples
- Checklist
- Training
- Audits
The list goes on, virtually anything can be used to build an email list, just think back to what you have requested by given your details. No matter what niche your business is in (or you want to be in) email marketing is still a very powerful tool.
Okay, I have shown you the proven step by step guide to building your own website fro scratch now all you have to do is the last step!
Promote, Promote And Promote
Once you have your website built all there is to do is get out there and tell people about it. Yes your site will be indexed in the search engines but to actually rank on the first page can take time and money so having your website link in as many places as possible is always a good thing.
Here are some easy ways to promote your website link to get you started…
- Business Cards
- Letterheads
- Social Media Accounts (Facebook, Twitter, Instagram, Pinterest, Linkedin and Youtube all allow links)
- Company Vehicles
- Forums
- Company Clothing
- On Documents/Instructions/Training Manuals
- Yahoo Answers
- Blog Comments
- Leaflets
- Merchandise Keyrings/Pens/Magnets/Mugs
- Email Signature
- Online Communities
I could go on there are hundreds of different places, so get thinking and get promoting!
Wrapping Up
I trust you have found this article helpful and will take action and follow the easy steps to build a website from scratch for your business.
For ongoing training on making money with an online business check out my no1 recommendation Wealthy Affiliate which is an amazing community of like-minded people all starting, or successfully operating a business on the internet.
I wish you every success with building your website and your business in general, by taking action today you will have a better tomorrow.
Disclosure:- Affiliate links may be used within this post. This means that if you purchase through my site after clicking a link when I get a small commission, at NO extra charge to yourself. This helps me to continue giving great free content. Thanks

Hi, I used to think that building a website was overly difficult, however, I am amazed at the fact that I have one up and done all this work on it during the last 3 months.
I have almost 400 comments on my site and 30 posts. I also use Wealthy Affiliate to guide me too. I love that I know exactly what step I am on, and what actions I need to implement to move forward.
Most Gurus just tell you to go do “this or that” but you always feel lost with them, this is a great step by step guide I really enjoy that.
Thanks
Thanks, Jake and well done for taking action you are doing amazing. Yes, Wealthy Affiliate is a great source of guidance and support. 🙂
Thank you so much for awesome post! Creating a website can be so daunting to be honest. There seems to be so much to it, so it is probably best to take it one step at a time. I don’t have a lot of money, so going the free route is best for someone like myself. I would imagine, though, promoting it would be the hardest part!
There is nothing wrong with the free route to get you up and running Jessie, but with a view to having more control as you build your business. Promoting can take time and energy but by doing this yourself you can control your costs. Thanks for your comments I wish every success, feel free to contact me if you have any questions.
Hey Martin, good post it should really help people who are new to internet marketing. I will say what stuff I use for my online business to further help any newbies reading my comment. For me I like to use Namecheap for domain names and hosting (though I also use TMDHosting for certain sites). For themes I use Schema from MyThemeShop, Thrive, and then random free ones if I don’t need bells and whistles of Premium wordpress themes. Okay for wordpress plugins I highly recommend an SEO plugin so All In One SEO or Rank Math would be my top picks. For security I can recommend Anti-Spam plugin (that’s literally what it’s called) and Wordfence. I could go on and on so I will end my comment here. Listen to Martin he knows what he is doing and his advice will take you far. Remember to never give up and keep working hard! To your success.
Thanks for sharing some of the tools that you recommend. It’s always great to hear what others are finding works well. Like you say there are many different options out there and its finding what suits best for your business.
Hello, I have really enjoyed reading this very good post on your step by step analysis of how to create a good website. I see that the hosting platform that you have recommended here is bluehost. I have seen a couple of people talk about it and say that it works very well. I would also like to give it a try myself and try this to you have given here out. Nice work and thanks. I will definitely share this post.
Thanks, Henderson, glad you liked the post. Bluehost is a great company.